
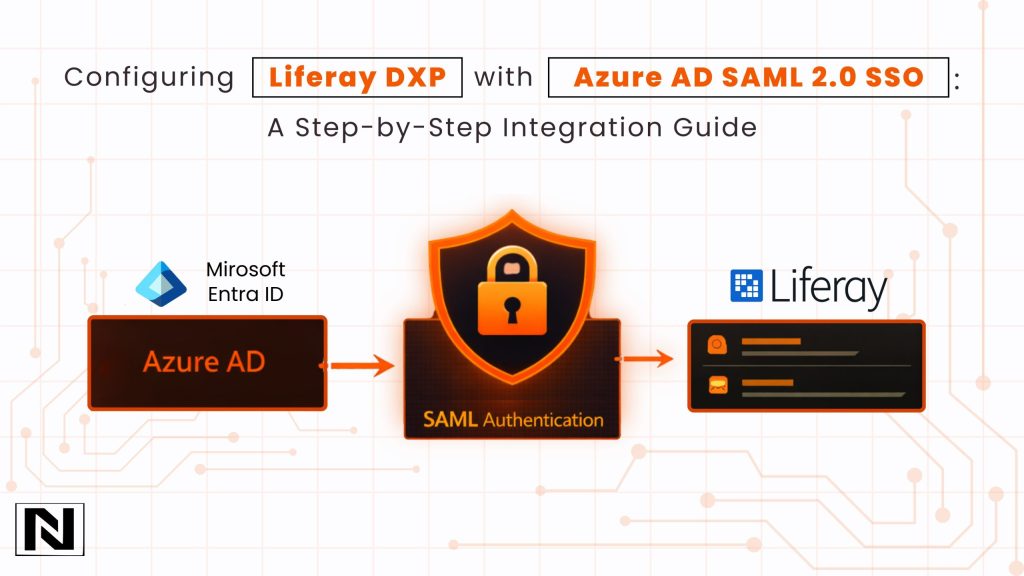
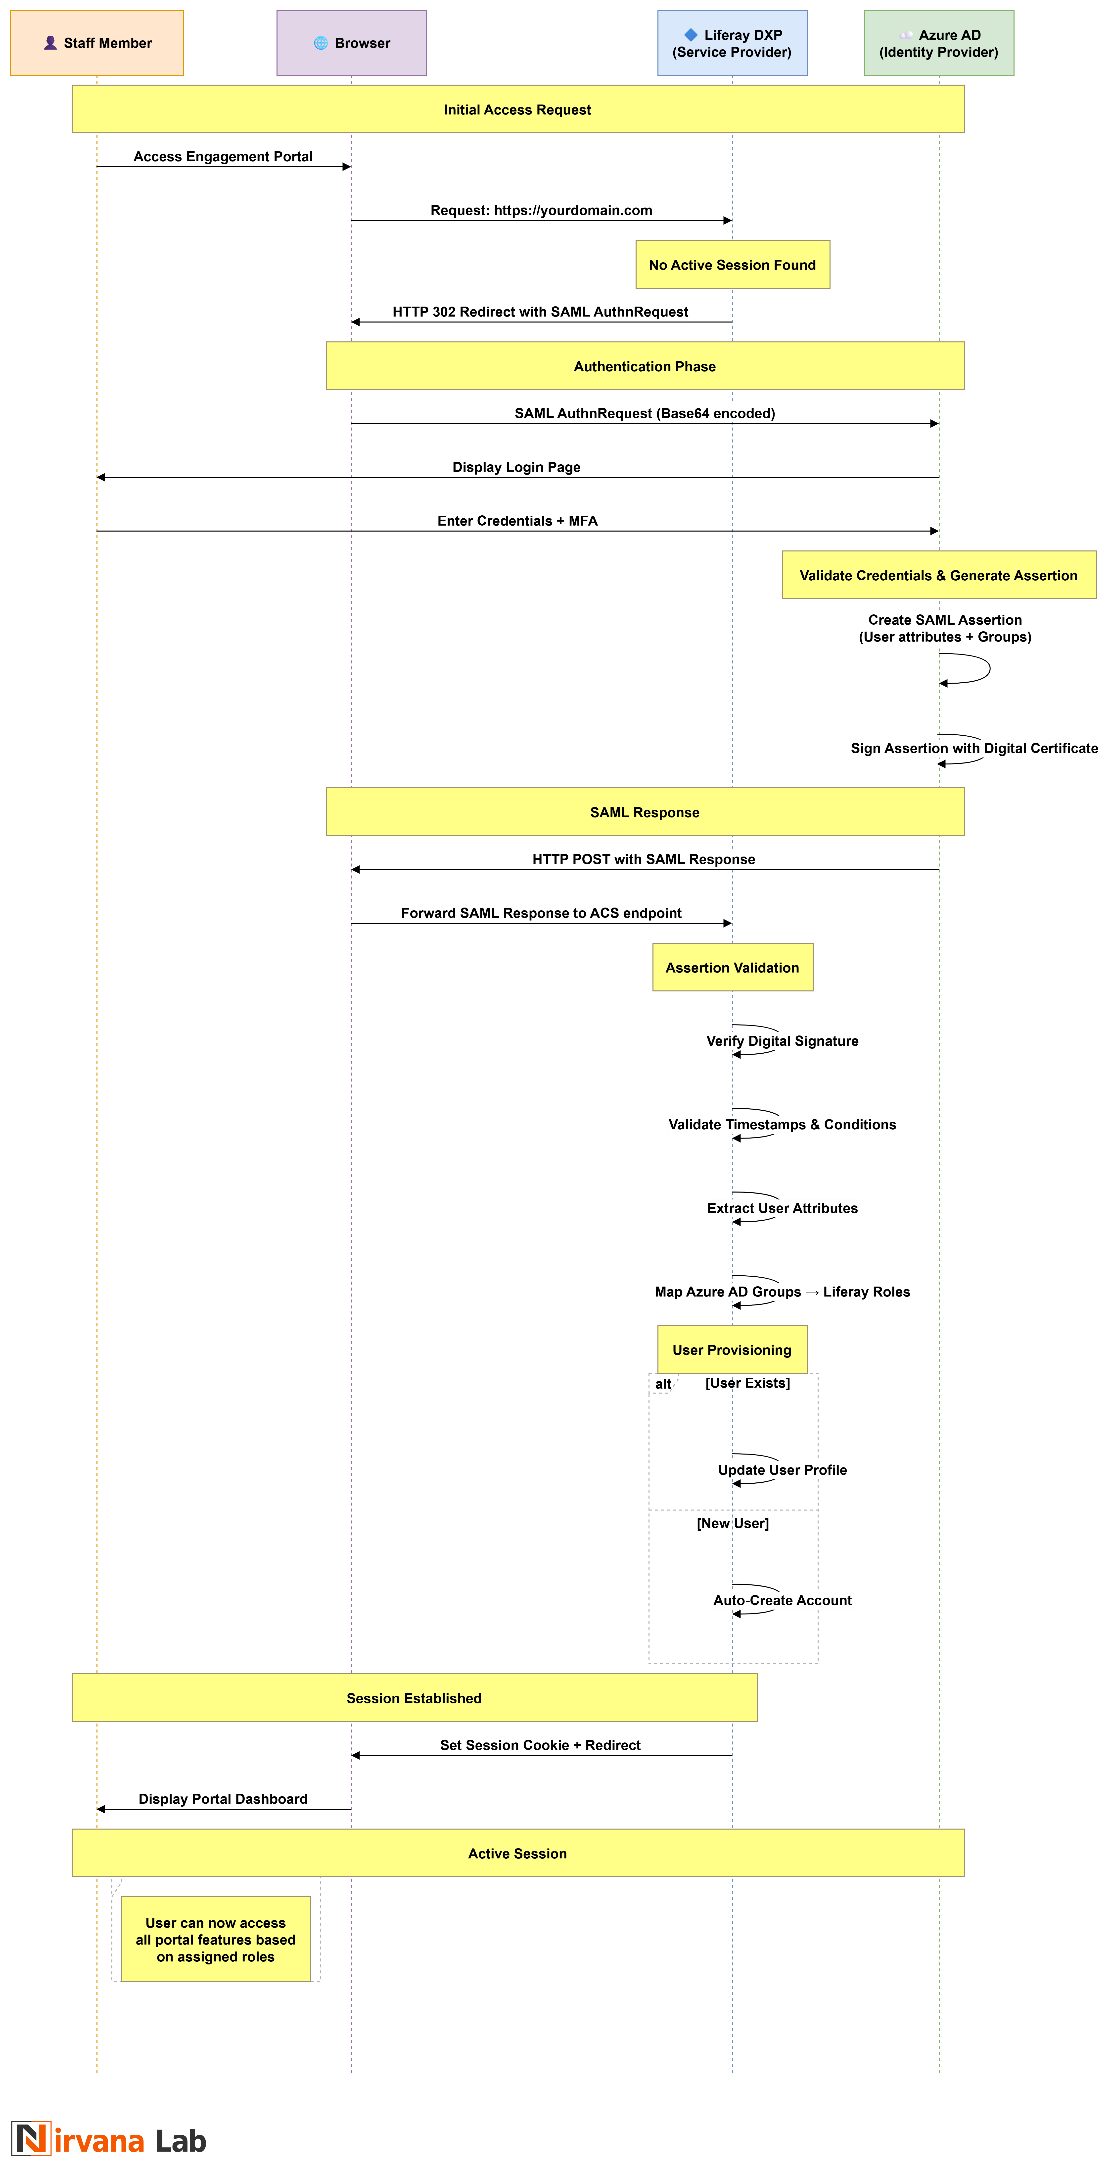
In today’s enterprise environment, seamless and secure authentication is essential. Organizations using Liferay DXP as their digital experience platform increasingly integrate it with Microsoft Entra ID (formerly Azure AD) using SAML 2.0 for Single Sign-On (SSO). This combination delivers centralized identity management, enhanced security, and a frictionless user experience.
This comprehensive guide walks you through configuring Liferay DXP as a SAML Service Provider (SP) with Microsoft Entra ID as the Identity Provider (IdP). Whether you manage an employee intranet, customer portal, or public-facing site, this integration eliminates password fatigue, simplifies compliance, and streamlines user provisioning.
Why SAML 2.0 Remains a Strong Choice for Liferay DXP and Microsoft Entra ID in 2026
While protocols like OpenID Connect (OIDC) gain popularity, SAML 2.0 excels for enterprise applications requiring rich attribute exchange. It transmits user profiles, group memberships, and organizational data directly in the signed assertion, enabling automatic role and permission assignment in Liferay without extra API calls.
For organizations with complex hierarchies, this means new employees receive appropriate Liferay roles based on their Entra ID group membership from day one. When users change departments or leave the organization, updating a single Entra ID account instantly reflects across Liferay and all connected systems - critical for security and compliance.
Benefits of Liferay DXP SAML SSO with Microsoft Entra ID:
- Reduced helpdesk tickets for password resets
- Stronger security through centralized credential management and MFA enforcement
- Automatic user provisioning and attribute synchronization
- Compliance support (GDPR, SOC 2, government standards) via audit-ready logging
- Improved user experience with one login for all tools

Figure: Sequence Flow of the overall process
Prerequisites
Before starting, ensure you have:
On the Liferay DXP side:
- Liferay DXP 7.3 or later (recommended: latest 2025.Qx release for best SAML support and security fixes)
- Administrator access to the Control Panel
- Valid SSL certificate (production environments require a trusted certificate; self-signed is acceptable only for testing)
- Liferay server able to reach login.microsoftonline.com and Entra ID endpoints
On the Microsoft Entra ID side:
- Appropriate licensing (Entra ID P1 or P2 recommended for advanced features like group claims)
- Global Administrator or Application Administrator permissions
- Users and groups already configured in Entra ID
Network considerations: Verify firewall rules allow outbound connections from Liferay to Entra ID and inbound access for users.
Step 1: Configure Liferay DXP as a SAML Service Provider
Log in to your Liferay DXP instance as an administrator. Open the Global Menu → Control Panel → Security → SAML Admin.
In the General tab:
- Set SAML Role to Service Provider.
- Enter a unique Entity ID, typically in the format https://yourdomain.com/saml (this must match exactly in Entra ID).
- Do not enable SAML yet – complete all configuration first.
- Save the settings. Liferay automatically generates a certificate and private key.
Navigate to the certificate section (General → Keystore/Certificates). For production, replace the self-signed certificate with one signed by your organization’s CA or a trusted provider. Download the SP certificate and note the Metadata URL (https://yourdomain.com/c/portal/saml/metadata).
In the Service Provider settings, enable:
- Require Assertion Signature
- Sign Authn Requests (recommended for production)
- Sign Metadata
- SSL Required
Step 2: Create the Enterprise Application in Microsoft Entra ID
Go to the Microsoft Entra admin center (entra.microsoft.com) → Enterprise Applications → New application → Create your own application.
- Name it descriptively (e.g., “Liferay DXP Portal”).
- Select Integrate any other application you don’t find in the gallery (Non-gallery) and create.
In the application overview:
- Go to Single sign-on → SAML.
- Under Basic SAML Configuration, edit and set:
- Identifier (Entity ID): https://yourdomain.com/saml (exact match to Liferay)
- Reply URL (Assertion Consumer Service URL): https://yourdomain.com/c/portal/saml/acs
Save the configuration.
Attributes & Claims: Ensure these core claims are present (Entra ID often includes defaults):
- Unique User Identifier (Name ID) → user.mail (set to Email Address format)
- givenname → First Name
- surname → Last Name
- mail → Email Address
For advanced role/group handling, add a group claim:
- Add group claim → Select Security groups → Source attribute Group ID (Object IDs). This passes group memberships in the SAML assertion for Liferay to consume.
Download the Federation Metadata XML or copy the App Federation Metadata URL. Using the URL is preferred as it supports automatic certificate rotation.
Step 3: Connect Microsoft Entra ID as Identity Provider in Liferay
Return to Liferay SAML Admin → Identity Provider Connections tab → Add Identity Provider.
Configure:
- Name: “Microsoft Entra ID” or “Azure AD”
- Entity ID: Copy from Entra ID metadata (usually https://sts.windows.net/{tenant-id}/)
- Metadata: Prefer the Metadata URL for dynamic updates. Alternatively, upload the XML file.
- Enabled: Check this box
- Name Identifier Format: Email Address
Save the connection.
Step 4: Configure User Attribute Mappings
In the IdP connection settings, map SAML attributes to Liferay user fields:
| SAML Attribute | Liferay Field |
|---|---|
| http://schemas.xmlsoap.org/ws/2005/05/identity/claims/emailaddress | emailAddress |
| http://schemas.xmlsoap.org/ws/2005/05/identity/claims/givenname | firstName |
| http://schemas.xmlsoap.org/ws/2005/05/identity/claims/surname | lastName |
Additional mappings (e.g., screenName from mailNickname) can be added as needed. Liferay supports matching users by email or other attributes.
Step 5: Role and Group Mapping (Advanced Configuration)
One of SAML’s most powerful features with Microsoft Entra ID is automated permission management via group claims.
First, in Entra ID (Attributes & Claims section), ensure a multi-valued group claim is included. Common options:
- Add group claim → Security groups → Source attribute: Group ID (sends Object IDs/GUIDs) OR
- Emit groups as role claims (sends group names or custom format).
In Liferay SAML Admin → Identity Provider Connections → [your Entra ID connection] → User tab (or User Attribute Mappings area):
- Map the incoming SAML attribute that contains the groups to Liferay’s special field userGroups.
- Example: If Entra ID sends group names in an attribute named "groups" or "http://schemas.microsoft.com/ws/2008/06/identity/claims/groups", set:
- SAML Attribute: groups (or the exact URI)
- Liferay Field: userGroups
Important notes:
- The values sent by Entra ID must exactly match the names of pre-existing User Groups in Liferay (case-sensitive).
- Liferay does not automatically create new User Groups from the assertion – you must create them manually in advance (Control Panel → Users → User Groups).
- Once mapped correctly, on successful SAML login, Liferay synchronizes the user’s group memberships to match exactly what is sent in the SAML assertion: the user is added to matching existing User Groups and removed from any previously assigned groups that are no longer present in the assertion (for groups under SAML management).
- Assign Liferay roles (e.g., Site Administrator, Content Reviewer) to these User Groups so membership automatically grants the desired permissions.
This setup eliminates most manual permission management and keeps roles in sync when group assignments change in Entra ID – provided the groups already exist in Liferay.
Identity Provider Connections
Step 6: User Provisioning Settings
In the IdP connection:
- Enable Auto Create User so first-time logins automatically create accounts in Liferay using data from the SAML assertion.
- Enable Auto Update User to keep profiles (name, email, etc.) synchronized on subsequent logins.
- Configure default landing pages or site memberships for new users as needed.
Step 7: Testing the Integration
Test thoroughly before going live:
- Open an incognito window and navigate to your Liferay site.
- You should redirect to the Microsoft Entra ID login page.
- Authenticate with a test user (including MFA if enabled).
- Verify redirect back to Liferay, profile data population, and role/group assignments.
- Test Single Logout (SLO) and access control for different user types.
Recommended debugging tools:
- Browser developer tools to inspect SAML requests/responses
- SAML-tracer extensions (e.g., SAML Chrome Panel)
- Liferay logs (increase logging for com.liferay.saml packages)
Common issues and fixes:
- Clock skew – Synchronize server clocks with NTP; adjust Clock Skew setting in SAML Admin.
- URL mismatches – Ensure Entity ID, ACS URL, and metadata match exactly (no trailing slashes issues).
- Assertion validation failures – Confirm signing certificates and required signatures.
- Group/role issues – Verify the groups claim appears in the SAML assertion.
Step 8: Production Hardening and Security Best Practices
- Replace self-signed certificates with trusted ones.
- Enable assertion encryption where supported.
- Implement IP restrictions or conditional access policies in Entra ID.
- Align session timeouts between Liferay and Entra ID.
- Enable comprehensive auditing and monitoring of sign-in logs in both systems.
- Regularly review and rotate certificates per your security policy.
The Business Impact of Liferay DXP + Microsoft Entra ID SAML SSO
Organizations implementing this integration typically see dramatic reductions in password-related support tickets, faster onboarding, and stronger security posture. Centralized identity management means offboarding is instantaneous and compliant, while users enjoy a single, familiar login experience across the digital workplace.
Liferay DXP’s open standards approach ensures compatibility with your existing Microsoft ecosystem without proprietary lock-in. As enterprises continue adopting hybrid and cloud-first strategies, robust SAML integrations like this become foundational for secure, scalable digital experiences.
Ready to Implement?
This guide provides a battle-tested path to successful Liferay DXP and Microsoft Entra ID SAML integration based on official Liferay documentation and proven enterprise practices. For complex environments or custom requirements (such as advanced role provisioning or multi-IdP setups), consult Liferay’s full SAML documentation or engage certified partners.
Start with a staging environment, follow the steps methodically, and thoroughly test before production deployment.